Add the capabilities of DocuVieware HTML5 Viewer and Document Management Kit into your Electron-based web application in a few easy steps.
- What is Electron?
- Prepare your environment
- Create your Electron sample
- Integrate DocuVieware
- Add the switch language feature
- Add the custom signature field feature
- Run it!
1. What is Electron?
Electron is a framework for building desktop applications using JavaScript, HTML, and CSS. Experimenting with Chromium and Node.js in its binary, Electron allows you to maintain a JavaScript codebase and build cross-platform applications that run on Windows, MacOS, and Linux – no native required.
2. Prepare your environment
In order to create an Electron Sample, you will need to have DocuVieware, Node JS, and Electron installed on your machine. We recommend that you use the latest LTS version available.
Also, DocuViewer needs at least the .NET Framework 4.6 or .NET Core 3.0 to run properly.
3. Create your Electron sample
At the end of this tutorial, you will have an Electron app with DocuVieware embedded within. The application will let you use DocuVieware’s default features, choose the language of the viewer, and dynamically create a custom signature field and sign it.
Create a new folder, “DocuVieware-electron-sample” and within, another one called “Client.”
Once the folder is created, launch the CMD at its path and run the “npm init” command. Set the package name and the information asked by NodeJS.
This command creates a package.json file for your project’s frontend. A package.json file is a file that contains information about the project’s packages and dependencies. It also contains metadata for the project, such as version number, author, and description.
Once it’s done, launch “npm i –save-dev electron.” It will add the third-party package to the package’s development dependencies.
In the package.json, under “scripts”, add “start”: “electron .”, it sets node scripts to run.
Change the “main” parameter to “app/server.js.”
Create an “app” folder, and add an index.html file with this HTML code to give your application a nice loading screen.
<!DOCTYPE html>
<html>
<head>
  <meta charset="UTF-8">
  <title>DocuVieware Sample</title>
  <style>
    html,
    body {
      margin: 0px;
    }
  </style>
</head>
<body style="height: 100vh; width:100vw;">
<img src="https://www.pdfa.org/wp-content/uploads/2019/02/Logo_DocuVieware_no_version-wpv_x200.png" style="position: absolute; position: absolute; margin: auto; top: 0; left: 0; right: 0; bottom: 0;" />
</body>
</html>
Create a server.js file within the app folder, and add this code to create the default window:
const { app, BrowserWindow, Menu } = require('electron')
const path = require("path")
require('dotenv').config()
var win = null; function createWindow()
{
win = new BrowserWindow({ width: 800, height: 600 });
win.loadFile('app/index.html')
}
app.whenReady().then(createWindow)
Now, in the “Client” folder, run the “npm i dotenv” command in the CMD.
At this step, if you run the npm start, the app should load with the DV image.
4. Integrate DocuVieware
Create a “Server” folder beside the “Client” one, and create a Visual Studio project within.
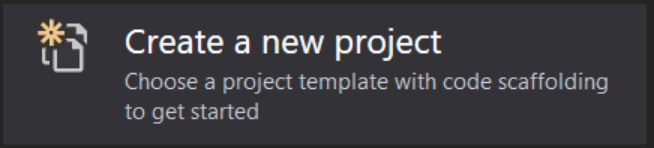
Run Visual Studio and click on “Create a new project.”
Choose the “ASP.NET Core Empty” project.
Choose the “ASP.NET Core Empty” project.

Give your project a name and choose the “Server” folder as a location, then click “next.”